About this routine
Five floor moves for your abs and the muscles that hold your spine steady: dead bug, bicycle crunch, bird dog, lying leg raise and a plank. Two sets of each, and you need only a mat.
For beginners and for lifters who want a short core session after training. If your lower back gets sore easily, start with the Core and Posture session below, which swaps the crunch and leg raise for a Superman and a hollow body tuck.
The week
3 days a week
On its own, or at the end of three strength workouts. A day off between sessions is enough.
- MCore
- TRest
- WCore
- TRest
- FCore
- SRest
- SRest
The workout
Before you start
If you have a medical condition or an injury, check with a doctor before starting a new exercise routine.
Stop any exercise that causes pain, dizziness, or strain somewhere you don't expect it.
Warm-up, about 5 minSee moves
- Spot jog45 seconds
- Jumping jacks30 seconds
- Arm circles10 each way
- Hip circles8 each way
- Bodyweight squat10 reps
- Light practice set of Dead Bug1 to 2 sets
-
1
Dead Bug
2 × 8 to 10 repsAbdominals
How to do it
- Lie on your back. Lift your knees above your hips, bent at a right angle, and reach both arms up to the ceiling.
- Brace: tighten your stomach as if someone is about to poke it, and keep breathing. Your lower back should feel relaxed, not tense.
- Slowly lower one arm behind your head and straighten the opposite leg toward the floor. Only go as low as you can without your back arching.
- Bring them back to the start, then switch sides.
- Stop if you feel strain in your lower back or neck.
-
2
Bicycle Crunch
2 × 8 to 10 repsAbdominals
How to do it
- Lie on your back with your hands lightly behind your head and your knees lifted.
- Tighten your stomach and lift your shoulders a little off the floor.
- Bring one elbow toward the opposite knee as you straighten the other leg, then switch, like pedalling.
- Move slowly and turn from your ribs. Do not pull on your neck with your hands.
- Stop if you feel strain in your neck or lower back.
-
3
Bird Dog
2 × 15 secAbdominals
How to do it
- Start on your hands and knees, hands under your shoulders and knees under your hips.
- Brace: tighten your stomach as if someone is about to poke it, and keep breathing.
- Reach one arm forward and the opposite leg back. Lift the leg only to hip height. Higher than that moves the work into your lower back.
- Hold for a second or two with your hips level, then come back to the start.
- Switch sides every rep, so each side gets a short rest.
- Stop if you feel it in your lower back.
-
4
Lying Leg Raise
2 × 8 to 10 repsAbdominals
How to do it
- Lie on your back with your legs straight and your arms by your sides, palms down.
- Brace: tighten your stomach as if someone is about to poke it, and keep breathing.
- Lift both legs together until they point at the ceiling. Bend your knees a little if that is easier.
- Lower them slowly, only as far as you can while keeping your stomach tight.
- Stop if you feel it in your lower back.
-
5
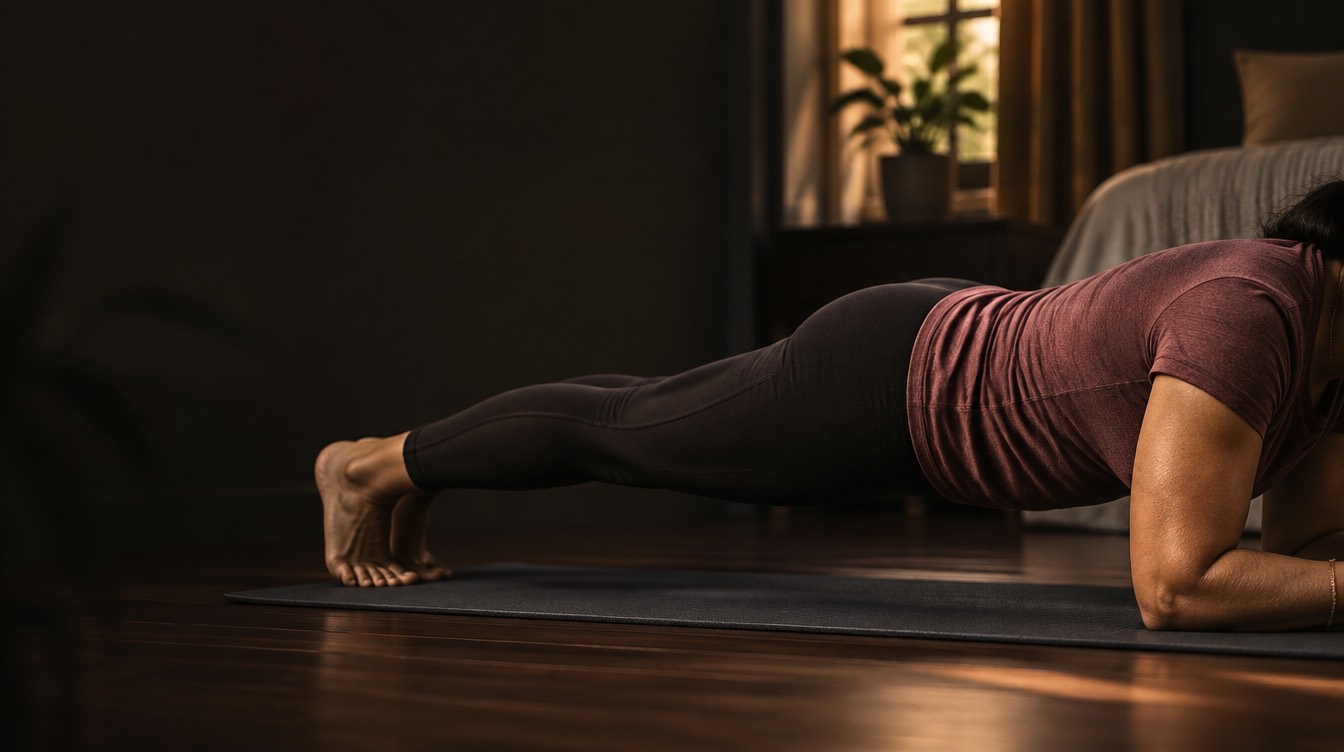
Front Plank
2 × 20 secAbdominals
How to do it
- Rest on your forearms with your elbows under your shoulders and your legs straight behind you.
- Brace: tighten your stomach as if someone is about to poke it, and squeeze your bottom.
- Keep your body in a straight line from head to heels. Do not let your hips drop or raise your bottom up.
- Breathe steadily and hold. Too hard? Drop your knees to the floor.
- Stop if you feel it in your lower back.
Cool-down, about 3 minSee moves
- Easy walk1 minute
- Chest stretch30 seconds
- Quad stretch30 seconds each leg
- Child's pose30 seconds
Rest and progress
Rest between sets
- Rest 30 to 60 seconds between sets. Core sets are short, so you recover quickly.
- Do both sets of one move before going to the next.
How to progress
- Weeks 1 and 2: learn the moves. Keep your stomach tight, as if someone is about to poke it, and stop if you feel it in your lower back.
- Add reps or seconds. When every set reaches the top of its range, slow the reps down or hold each one for a second.
- When the 10 minute version feels easy, switch to Core and Posture below, which has 3 sets of each move.
Swaps
- Lying leg raise hurts your lower back
- Bend your knees, or only lower your legs as far as you can keep your back flat.
- Front plank too hard
- Plank on your knees, and add seconds until you can hold the full version.
- Bicycle crunch strains your neck
- Keep your hands light behind your head and move from your stomach, or swap it for a second round of dead bugs.
- Want it harder
- Hollow body tuck, from the Core and Posture session below.
The longer version: Core and Posture
Three sets of five moves, including the Superman for your lower back and a hollow body tuck. Good on its own day.
Warm-up, about 5 minSee moves
- Spot jog45 seconds
- Jumping jacks30 seconds
- Arm circles10 each way
- Hip circles8 each way
- Bodyweight squat10 reps
- Light practice set of Bird Dog1 to 2 sets
-
1
Bird Dog
3 × 15 secAbdominals
How to do it
- Start on your hands and knees, hands under your shoulders and knees under your hips.
- Brace: tighten your stomach as if someone is about to poke it, and keep breathing.
- Reach one arm forward and the opposite leg back. Lift the leg only to hip height. Higher than that moves the work into your lower back.
- Hold for a second or two with your hips level, then come back to the start.
- Switch sides every rep, so each side gets a short rest.
- Stop if you feel it in your lower back.
-
2
Dead Bug
3 × 8 to 10 repsAbdominals
How to do it
- Lie on your back. Lift your knees above your hips, bent at a right angle, and reach both arms up to the ceiling.
- Brace: tighten your stomach as if someone is about to poke it, and keep breathing. Your lower back should feel relaxed, not tense.
- Slowly lower one arm behind your head and straighten the opposite leg toward the floor. Only go as low as you can without your back arching.
- Bring them back to the start, then switch sides.
- Stop if you feel strain in your lower back or neck.
-
3
Superman
3 × 12 to 15 repsLower back
How to do it
- Lie face down with your arms stretched past your head and your legs straight.
- Squeeze your bottom and tighten your stomach.
- Lift your arms, chest and legs a few centimetres off the floor. A small lift is enough.
- Hold for a second, then lower slowly.
- Look at the floor to keep your neck long. Stop if you feel a pinch in your lower back.
-
4
Hollow Body Tuck
3 × 15 secAbdominals
How to do it
- Lie on your back and bring your knees up toward your chest, knees bent.
- Brace: tighten your stomach as if someone is about to poke it, and keep breathing.
- Lift your head and shoulders a little off the floor and reach your arms forward.
- Hold. Keep your knees bent: straightening the legs makes this much harder.
- Stop if you feel it in your lower back or neck.
-
5
Front Plank
3 × 20 secAbdominals
How to do it
- Rest on your forearms with your elbows under your shoulders and your legs straight behind you.
- Brace: tighten your stomach as if someone is about to poke it, and squeeze your bottom.
- Keep your body in a straight line from head to heels. Do not let your hips drop or raise your bottom up.
- Breathe steadily and hold. Too hard? Drop your knees to the floor.
- Stop if you feel it in your lower back.
Cool-down, about 3 minSee moves
- Easy walk1 minute
- Chest stretch30 seconds
- Quad stretch30 seconds each leg
- Child's pose30 seconds
Questions
Will an ab workout burn belly fat?
Not on its own. In one study, 6 weeks of ab exercises did not reduce belly fat, though it did improve ab endurance. Nutrition is the other big factor.
How long does this ab workout take?
About 10 minutes, plus a short warm-up. Core and Posture takes about twice as long.
How often should I train abs?
Three times a week with a day off in between, as in the schedule above. If your core is still sore, take another day.
Can I do this after a gym workout?
Yes. It is short enough to add at the end of a strength session. Do it after your main lifts, not before, so your core is fresh for those.
Do I need any equipment?
No. A mat or a carpet makes the floor moves more comfortable.
More routines

Sources
The Akhada team picked these exercises from our catalog of 7,000+ demonstrated movements. A strength coach reviewed the step-by-step cues for every exercise in our starter routines, these included. The schedule and what ab training can and cannot do follow the research below.
-
Six weeks of ab exercises alone did not reduce belly fat, but it did improve ab endurance. That is why this page makes no fat loss promise.
-
Adults should do muscle-strengthening work for all major muscle groups on 2 or more days a week. Core work is one part of that, not the whole of it.
-
Large muscles and multi-joint lifts go before small muscles and single-joint work. That is why core work goes at the end of a gym session.